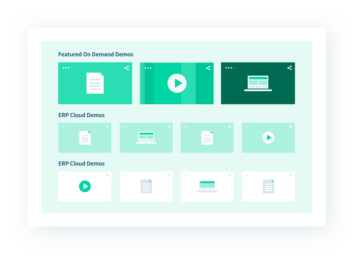
Earlier this year we introduced ON24 Target, our approach to helping marketers personalize, distribute and measure content performance across personas from a single system. Powered by the ON24 platform, Target provides marketers with access to their best assets, from webinars to videos to white papers, match the highest-performing pieces to specific personas and drag-and-drop that content into a personalized content experience.
Ready to take your ON24 Target experience to the next level? Learn how you can get started with our free e-book. [Read Now]
ON24 Target is a new product and it’ll take some time for users to familiarize themselves with the product. To get you more comfortable with Target, we’re putting together a small series demonstrating its abilities, interface and more. For the segment, we’re going to dive into how to access and navigate Target.
Accessing Target
Accessing Target is simple. Log into the ON24 platform and look at the left-hand column. There you’ll see several icons. Click on the fifth icon the one with mountains to gain access to your Target dashboard.
This is your Target dashboard. Here you can see a list of your content experiences and organize them by creator and project. To create a new content experience, simply click the orange “Create Experience” button at the top of the dashboard.
Select the Gateway you want your content experience to be associated with, enter a title and write an abstract. Click “Create” and enter Target Experience Creator. You should be on the “Attributes” tab.
How to Use Target
Okay. Let’s take a look at the Target Experience Creator dashboard. You’ll notice a sidebar on the left with buttons. These are your Target creation tabs. From top to bottom you have “Attributes,” “Layouts,” “Content,” “Widgets,” and “Styling.” Each will take you to the main sections of ON24 Target’s editor.
At the very bottom of the tabs sidebars are two buttons. The first icon, the eye, is your preview button. Click this at any time to see your Target Experience as your visitors will see it. The bottom icon, the arrow pointing up, is publish. This will push your Target Experience live.
Attributes
The attributes page lets you adjust your Target Experience’s attributes. This includes the experience name, your campaign code (if the experience is a part of a larger ABM campaign, for example), abstract and more. This is also the tab where you’ll set up your registration page and security (if necessary) and set a thumbnail.
There are more complex elements to dig into, like Domain Filtering and add HTTP Referring, but for now we’re going to keep things at a high-level to get you up and running. Let’s take a look at the “layouts” tab.
Layouts
The second icon from the top (the one that looks like a Piet Mondrian painting) takes you to your “layouts” tab. When you click on the “layout” tab you’ll see three main areas. On the far left are your tab buttons, where “attribute,” “layout,” and other sections are listed.
To the right of the tab buttons is your editor section, which is where you’ll select Target Experience layout. You’ll also see this section in the “Content,” “Widgets” and and “Styling” sections. To the right of the editor column is the Experience Editor pane.
The Experience Editor is a WYSIWYG (what you see is what you get) editor. Any changes you make in your Experience Editor, from ”drag and drop” content, to changes in color, font size and more, will be reflective of what your visitors will experience.
Finally, there’s the editor column. In the editor column, you’ll see five Target Experience templates. Simply click on an experience to change the layout of your Target Experience page.
Content
Below the “layouts” button you’ll see the “content” tab. Here, you’ll see the content selector in the editor section. You can select which account you’ll pull content from, search and filter content. To filter your content, click the three lines to the right of the search bar. Three filter options, “Sort by,” “Type Filter” and “Date Filter,” will pop up below the search bar.
With the “Sort by” filter, you can filter content by date created and content type. The “Type” filter lets you fine-tune the content types you want to see in the editor section. Options include “Document,” “Video,” “Webcast,” “Webcast Video,” and “Webpage.”
Finally, the “Date” filter allows you to sort content by when it was created. Your options here are “Last 30 days” and “Last 90 days.” You can also load more content into your editor section by simply scrolling to the bottom of your content list and clicking on the “load more” button.
Widgets
Below the “content” tab is the “Widgets” tab (identified by the icon with four squares). The widgets section is a work in progress — the “contact us” tool being the only widget so far — but here you’ll be able to select widgets and drag and drop into the Experience Editor pane.
Just in case you’re curious, “contact us” tool provides visitors with the ability to connect with a salesperson or other point of contact with one click.
Styling
Finally, there’s the “styling” tab (look for the icon with the paintbrush and pen). Here, you can change, adjust and style the look of your Target Experience. You can adjust the background color, add a gradient, upload a background image adjust foreground colors, adjust header and body text, style tiles and select display options.
If your organization has a pre-established style, you can click on the “Inherit Content Gateway Styling” switch at the top of the editor section to inherit a style from your content gateway.


