


Webcam and Microphone Test – Check Your Camera and Mic Online
Check your webcam and microphone online with ON24. Free, fast, and secure—no downloads required.

Start the Test
Testing your camera and microphone takes only a few seconds. Follow these simple steps to make sure your setup is ready:
Click 'Allow' when you see a prompt in the browser.
Your privacy is important to us.
Your webcam test is NOT being recorded or stored in any manner.
Test Your Camera and Microphone in Seconds
Getting ready for an online meeting or webinar should be simple. With the ON24 webcam and microphone test, you can confirm your camera feed and check your mic sound instantly. Just click Start Test, allow your browser access, and see your video and hear your audio in real time.
No downloads, no sign-ups, only a fast and secure way to test your camera and mic online before you go live.
Still having trouble? Your camera or mic might be blocked
If your devices aren’t appearing in the test above, it’s usually due to a browser permission or a system setting. Use our step-by-step guide below to manually test your webcam and microphone setup for Windows, Mac, or Chrome.

How to Test Your Webcam and Microphone Online
Testing your camera and microphone takes only a few seconds. Follow these simple steps to make sure your setup is ready:
-
- Click Start Test.
- Allow your browser to access your webcam and microphone.
- Check your live video feed on screen.
- Speak into your mic to hear your sound test in real time.
That’s it. You’ve completed your webcam and mic test. This quick check ensures your camera and microphone are working properly before you join a virtual meeting, online event, or webinar.

Still having trouble? Your camera or mic might be blocked
If your devices aren’t appearing in the test above, it’s usually due to a browser permission or a system setting. Use our step-by-step guide below to manually test your webcam and microphone setup for Windows, Mac, or Chrome.
How to Manually Test and Fix Your Webcam Settings
If the online tool isn’t displaying your feed, follow these steps to check your camera hardware and browser permissions:

Testing Your Webcam on Windows
- Open the Camera App: Type “Camera” into the Windows search bar and select the app.
- Check the Live Feed: If the video appears clear and stable, your webcam is working.
- Troubleshoot Drivers: If the camera doesn’t work, open “Device Manager” from the Control Panel. Locate the “Cameras” section, right-click your camera, and select “Update driver.”
Testing Your Webcam on Mac
- Open Photo Booth: Launch the Photo Booth app (pre-installed on all Macs).
- Confirm Live Preview: If your image appears, your camera is operational.
- Check Privacy Permissions: If it doesn’t work, go to System Preferences > Security & Privacy > Privacy and ensure Photo Booth (and your browser) has camera access.
Testing Your Webcam on Chrome
- Grant Permissions: When prompted by a site, click “Allow” to grant Chrome access to your camera.
- Manage Site Settings: If the feed doesn’t appear, click the Lock icon next to the URL or navigate to Settings > Privacy and Security > Site Settings to ensure the camera is enabled for this specific site.
How to Manually Test and Fix Your Microphone Settings
If your audio levels aren’t registering, use these steps to verify your microphone input and volume settings:

Testing Your Microphone on Windows
-
- Open Sound Settings: Type “Sound” into the Windows search bar and open the settings menu.
- Check the Input Meter: Under the “Input” section, select your microphone and speak. Watch the volume meter for movement.
- Adjust Sensitivity: If the bar isn’t moving, click “Device Properties” to increase the microphone’s volume or sensitivity levels.
Testing Your Microphone on Mac
- Access Sound Input: Open System Preferences and select “Sound,” then click the “Input” tab.
- Verify Input Level: Choose your microphone from the list. Speak into the mic and observe the input level indicator.
- Adjust Gain: If the bar isn’t moving or is too low, move the “Input Volume” slider to the right to increase clarity.
Testing Your Microphone on Chrome
- Allow Access: Click “Allow” when Chrome prompts you for microphone access.
- Verify the Site Toggle: If the website doesn’t register your voice, go to Settings > Privacy and Security > Site Settings. Ensure the microphone isn’t blocked and that the correct input device is selected in Chrome’s default settings.
How to adjust webcam and audio settings within Elite Studio
Log into Elite Studio as a presenter.
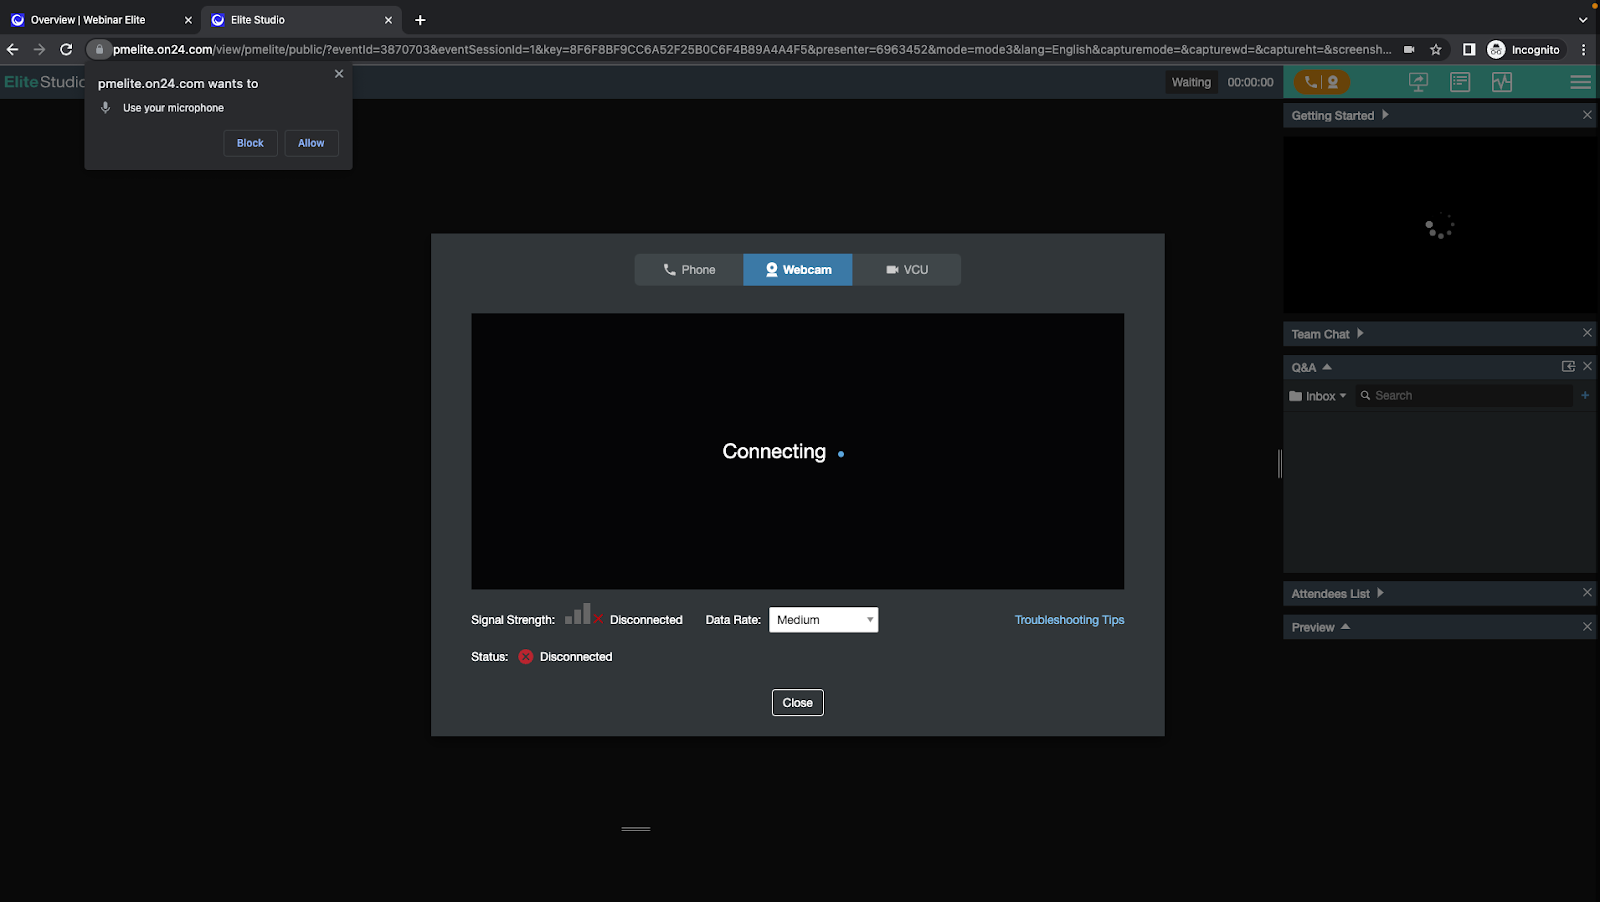
Select “Allow” to give pmelite.on24.com permission to use your microphone and webcam.
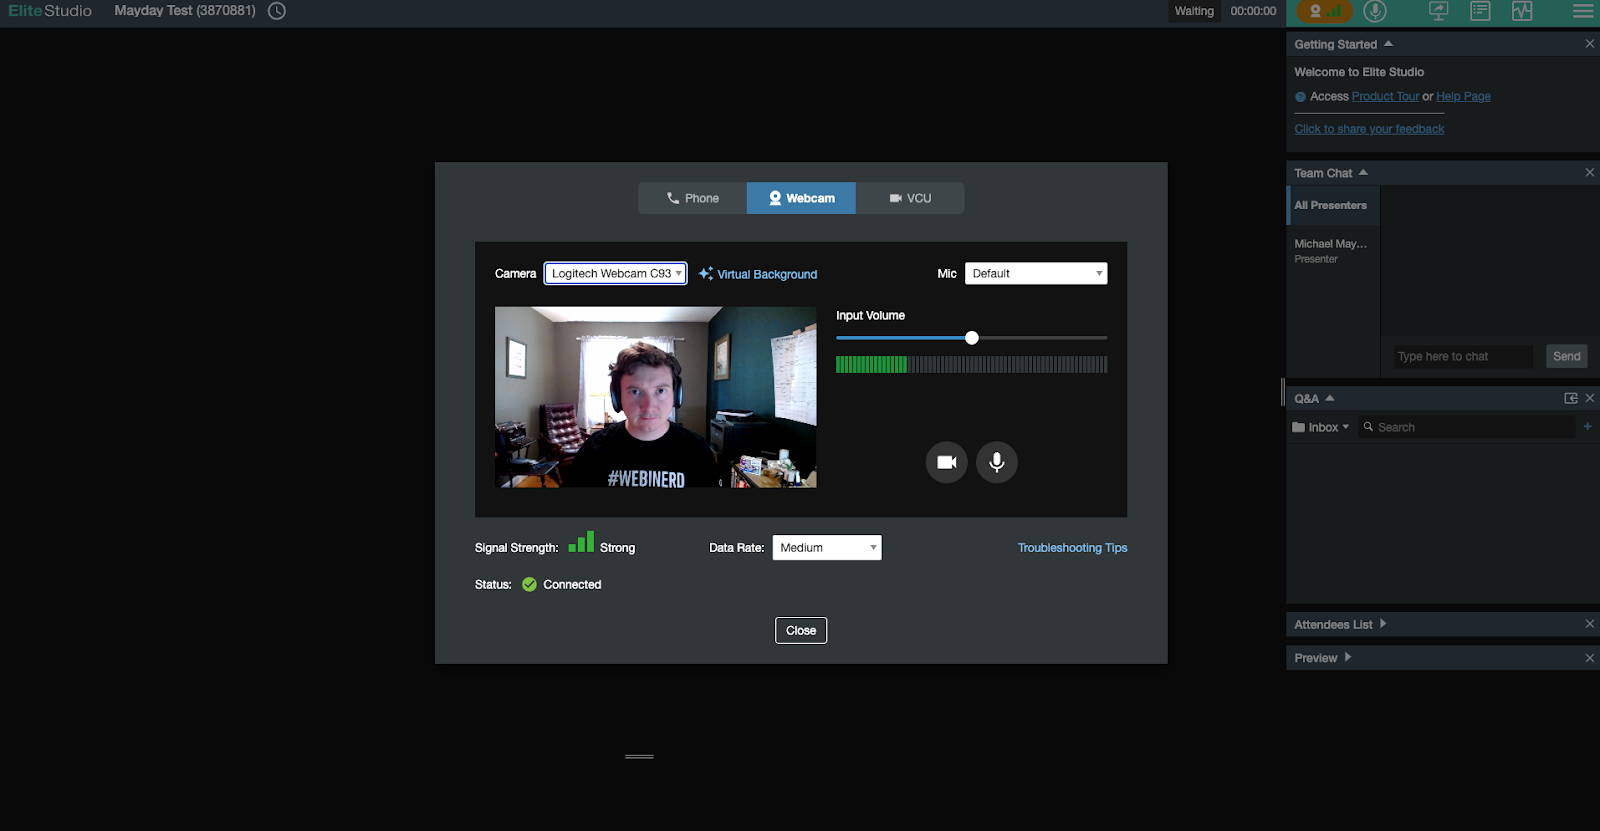
Test your connection. When your webcam connects, click on the camera selector above your video stream to change your primary webcam. To change your audio source, click on the Mic menu to the right of your screen and select your preferred microphone.
Additional Troubleshooting Tips
Tech can get complicated now and then. If you’re still running into issues, try these troubleshooting tips to see if you can correct any underlying issues.
What should you do if your webcam isn’t working?
- Close any other unused apps, particularly those that have access to your webcam. We don’t advise running apps like Zoom, Skype, or Microsoft Teams alongside Webcast Elite.
- Make sure your browser isn’t blocking access to devices.
- Clear your cache.
- Restart your computer (if you have time!).
- Check your cable connections.
What about if your mic isn’t working?
Adjust your microphone volume settings per your device’s instructions, or disconnect and reconnect your microphone.
Make sure the microphone you want to use is connected and selected
What if I want to hide my background?
We get it. Sometimes a home office or background should go unseen. Fortunately, Webcast Elite provides virtual backgrounds for just such an occasion.
To access virtual backgrounds, open the audio-video panel (the orange button) in Elite Studio. Then, above your video feed, click on “Virtual Background.”
Why Use an Online Webcam and Microphone Tester?
Before you join an important meeting, webinar, or virtual event, it helps to know your camera and microphone are working the way they should. An online webcam and mic test gives you peace of mind and saves you from last-minute surprises. With ON24, you get more than a basic tool, you get reliability backed by years of digital engagement expertise.
Ensure You’re Ready for Virtual Meetings and Webinars
First impressions matter. Whether you’re presenting in a live webinar, joining a team meeting, or preparing for an online event, a quick check of your camera and mic can make all the difference. By running a fast webcam and microphone test, you’ll see your video feed, hear your sound, and confirm everything is ready before you go live. Search terms like test my cam, test mic online, or test my microphone and camera all point to the same goal: starting with confidence.
Quick, Free, and No Downloads Required
No extra software, no lengthy setup, no hidden steps. The ON24 camera and mic test is free, browser-based, and ready to use instantly. All you need is an internet connection and your device. In just a few clicks, you’ll know your webcam and microphone are working properly.
Powered by ON24’s Digital Engagement Expertise
Unlike generic testing tools, this experience is powered by ON24, the leader in webinars, digital events, and engagement analytics. That means you can trust the same standard of quality and security that global enterprises rely on every day. Testing your webcam and mic here isn’t just about a technical check—it’s about preparing for professional-grade digital experiences.

Ready to Take Your Online Events to the Next Level?
Testing your webcam and microphone online is the first step. The next is creating virtual experiences that engage, inform, and convert. ON24 gives you the platform to host professional webinars, run virtual events, and deliver digital experiences that connect with audiences everywhere.
With ON24, you can:
- Host webinars with interactive features like polls, Q&A, and surveys.
- Power virtual conferences and hybrid events with ease.
- Gain real-time engagement analytics to understand your audience and optimize performance.
From team meetings to product launches to demand generation programs, ON24 provides everything you need to deliver seamless, impactful digital experiences.

Frequently Asked Questions
Click Start Test, allow your browser to access your camera and mic, and you’ll see your video and hear your audio in real time. This webcam and microphone test is free, browser-based, and works instantly with no downloads required.
Yes, this test is completely secure and private. The process runs entirely within your local browser, and ON24 never records, stores, or shares your video or audio data. Once you close the tab, the connection to your hardware is terminated. This ensures a safe environment for testing your setup before a professional virtual event or webinar.
This tool is ideal for any digital experience where clear communication is vital, including webinars, virtual conferences, hybrid events, and professional video meetings. Running a quick check ensures your camera and microphone are functioning correctly, helping you maintain a professional image and avoid technical disruptions during live presentations.
Yes, you can test your devices directly through your web browser without installing any additional software or plugins. The ON24 testing tool uses standard WebRTC technology to access your camera and mic securely. This allows for an instant check on any device with a modern browser, saving you time and avoiding potential software conflicts.
If your hardware isn’t detected, it is likely being used by another application or blocked by browser permissions. Ensure apps like Zoom, Teams, or Skype are fully closed. Then, check your browser’s address bar for a Camera or Lock icon to confirm you have granted permission for this site to access your devices.
First, verify that your microphone is properly connected and not physically muted. Navigate to your system’s sound settings to ensure the correct input device is selected and that the volume levels are turned up. If the issue persists, try refreshing the page or restarting your browser to reset the connection.
To enhance your video feed, ensure you are in a well-lit area with light facing you rather than behind you. Clean your camera lens with a microfiber cloth to remove smudges and close bandwidth-heavy applications to ensure a stable connection. Positioning your camera at eye level also creates a more engaging and professional appearance for your audience.
Audio-video desync is usually caused by high CPU usage or limited internet bandwidth. To fix this, close any unused browser tabs and background programs, then refresh your testing page. For the best results, use a stable Wi-Fi connection or a wired Ethernet cable and ensure your browser is updated to the latest version.
When you first launch the test, a pop-up will appear in the top-left corner of your browser; click “Allow.” If you previously blocked access, you can reset this by clicking the Lock icon in the URL bar and toggling the Camera and Microphone switches to “On.” You may need to refresh the page for the changes to take effect.
Yes, the ON24 testing tool is fully compatible with most modern mobile browsers on iOS and Android. Simply open this page on your smartphone or tablet and follow the same prompts to allow camera and microphone access. This is a great way to verify your setup if you are joining an event on the go.
Yes. When you speak into your microphone during the test, the tool provides real-time audio playback. This feature allows you to hear exactly how you will sound to your audience, helping you identify and fix any issues with background noise, muffled audio, or low volume before your meeting begins.
Ensuring your hardware functions correctly prevents technical issues that can disrupt communication and stall your presentation. Pre-testing helps you maintain a high level of professionalism and ensures a smooth, engaging experience for all participants. It allows you to focus on your content rather than troubleshooting live.